| |
|
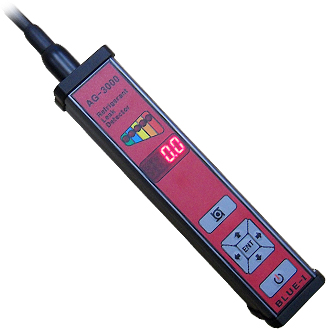
 - AG-3000 / Refrigement Leak Detector
| operating temperature range |
-20C~50C |
| Minimum sensitivity to R-22,R-134a,R-404a |
0.1oz/year(3gm/year) |
| size |
175mm X 75mm X 45mm |
| Probe length |
430mm |
| Pump suction capacity |
1800ml/min |
| Response rate |
2sec |
| Weight |
500gr |
Features
- The detector has the same sensitivity as R-22, R-134a,
R-404a, R-410a, R-507(AZ-50), CFS, HCFC and HFC. So you
don't have to reset or switch on the equipment by each refrigerant
and it's more useful to use this detector, especially, when
you don't know which refrigerant is used.
- The alarm gets louder when getting closer to leaking spots
and the sound gets smaller when it gets far from the spots.
You can detect the spots quickly and accurately.
- The detector is designed to show sensitively how much
refrigerant is leaking through the two indicators, H(high)
and L(low).
- The high efficient pump(1.8 litter/min) restores quickly
to its normal condition when it gets out of the leaking
spot and it keeps the air flowing through the sensor so
as to react with refrigerants around it.
- The detector has a specially designed flexible probe in
order to reach some difficult spots easily or some sports
with obstacles.
Before use
- AG-3000 Refrigerant Leak Detector has the infrared sensor
and the recharger installed inside the equipment and you
can use the detector anytime. The battery isn't charged
in full and you need to charge it enough with the A/C Adapter.
- After charging it in full, it can be used for 7 hours
and it's better to recharge the battery before it goes dead.
How to operate
- It's easy to operate the AG-3000. Switch on the "Power"
button and the machine turns on.
Then, it warms up for 16 seconds in total; the initial "blue"
screen for 6 seconds and its own calibration from CA-10
to CA-0 for 10 seconds. After these, you can hear the dial
tone for getting ready.
- To detect the leak, begin detecting by placing the AG-3000's
probe to the spot where the gas may leak with 5-6mm apart.
- Try to find out the exact leaking spot by moving the probe
slowly(about 3-4cm per second).
- When the AG-3000 detects the spot, you can see the amount
of detected leaking through ascending colors of green, sky
blue, yellow, orange and red in the LED window of the probe.
You can also hear the loud buzzer sound.
- Then, you can make sure the spot is leaking for sure by
placing the probe to a different spot and bringing it back
to the previous spot.
- When you try the spot with lots of debris many times or
you don't think the sensitivity is strong enough, you can
reset the machine by doing the ZERO calibration.
(How to calibrate: Turn on the equipment and press the "ENT"
button in the bottom after the warming-up for 16 seconds.
Then, press ↑ key and you can see "OCAL". Press
the "ENT" key again and the detector begins to
press the remaining pollutant gas inside the machine for
30 seconds.
If you still feel the detection is weak, you can open the
probe cap in front and check contamination level of the
filter cartridge inside the cap. You may exchange the filter
with a new one by the contamination level.
- When the detector isn't used for a while, it goes into
the "stand-by" mode, which reduces the electricity
consumption, in 10 minutes. When the "Stand-by"
mode continues for 30 minutes, it automatically turns off.
|
|
|